

Introduction: “Torch and Stick” Is Not as Simple as It Looks
Waterproofing is the last line of defense for any building. Among mainstream waterproofing materials, the SBS waterproofing membrane stands out for its wide temperature tolerance and reliable elongation.
That is why the SBS waterproofing membrane is widely used on roofs and basement walls. For membranes 3 mm thick or thicker, the standard installation method is hot-melt — a torch flame melts the modified bitumen on the underside of the membrane so it bonds to the substrate.
Hot-melt construction looks straightforward. In practice, however, every step has rules. Skip a detail and even the best SBS waterproofing membrane cannot keep water out. This article walks through the six most-overlooked points that make or break an installation.
1. Substrate Prep: The Foundation of the Membrane
The substrate is the foundation of any SBS waterproofing membrane system. Before the torch is even lit, the substrate must be solid, level, and dry — no dust, sand, oil or standing debris. Internal and external corners should be finished as a fillet or a 45° chamfer. Most importantly, the substrate must be dry: moisture content below 9%.
How do you check moisture on site? Use the 1 m² dry-lay test: lay 1 square meter of membrane flat on the substrate, leave it for 3–4 hours, then peel it back. If neither the substrate nor the underside of the membrane shows a water mark, the surface is dry enough.
Many crews rush the schedule and start laying as soon as the surface looks dry. Trapped moisture expands later under the heat of the torch, the membrane blisters, and the waterproofing layer is effectively compromised. Better to delay a few days than to lay an SBS waterproofing membrane on a wet substrate.
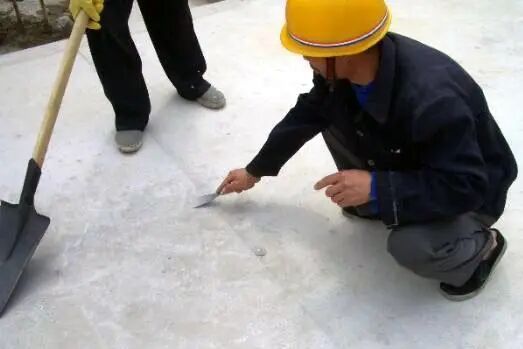
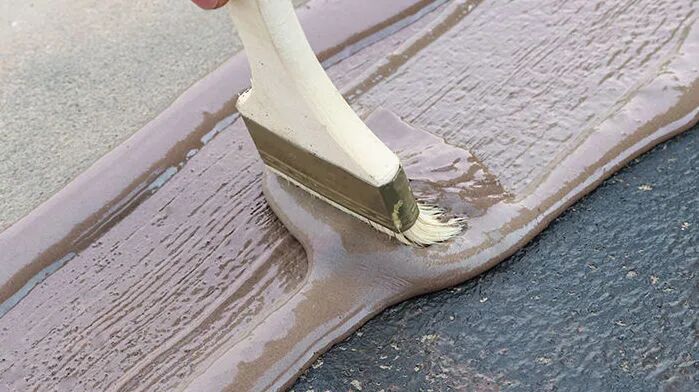
Once the substrate is accepted, apply the matching primer evenly across the surface — no misses, no thin spots. Wait until the primer is dry to the touch (at substrate temperatures above 5°C, this typically takes 4–8 hours) before laying the SBS waterproofing membrane.
2. Additional Layer: Reinforcing the Weak Nodes
Corners, pipe penetrations, rain-water outlets, eaves gutters, and movement joints are high-risk leak points. Many crews skip the additional layer to save time, and those nodes are exactly where the first leaks appear on an otherwise good SBS waterproofing membrane job.
The standard practice: before laying the main field of membrane, cut patches of the same SBS waterproofing membrane into the required shapes and torch them onto these critical nodes first, with a width of at least 250 mm.

3. Hot-Melt Laying: The Core Step of an SBS Waterproofing Membrane Job
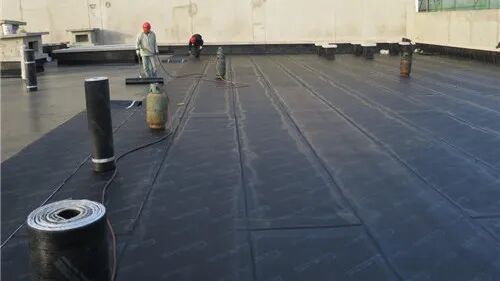
Hot-melt laying is where the membrane actually bonds to the substrate — and where crew skill matters most. There are three sub-skills to get right: flame distance and travel speed, heating degree, and rolling to expel air.
3.1 Flame Distance and Travel Speed
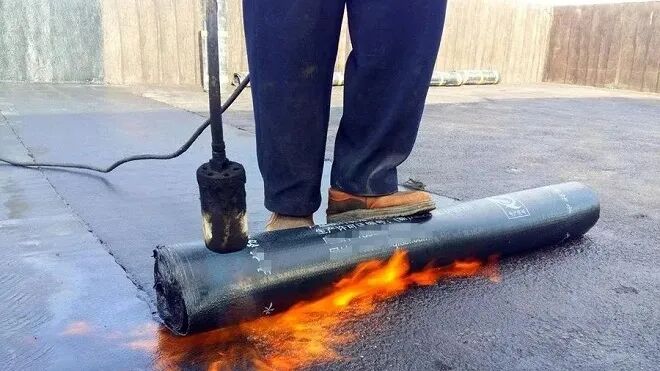
Hold the torch nozzle 0.3–0.5 m away from the SBS waterproofing membrane and the substrate. Sweep the flame side-to-side across the width at a steady pace so the membrane heats evenly. Never park the flame in one spot — the bitumen coating will overheat, the reinforcement scrim may show through, and in the worst case the membrane can burn through.
3.2 How to Judge the Right Temperature
What does “hot enough” actually look like? The reliable on-site indicator is the surface of the bitumen: it should turn dark, glossy, and slightly mirror-like, and a few fine bubbles should appear. At that point the bitumen is typically at 200–230°C — the sweet spot for the SBS waterproofing membrane.
Under-heating leaves the bitumen only partially melted, so the SBS waterproofing membrane cannot bond fully. Over-heating scorches the polymer-modified bitumen, ages it, and may burn through the carrier — both kill the bond.
While torching the membrane, also heat the substrate surface: the molten adhesive will chill on contact with a cold substrate and lose tack before it can wet out.

3.3 Roll and Expel Air
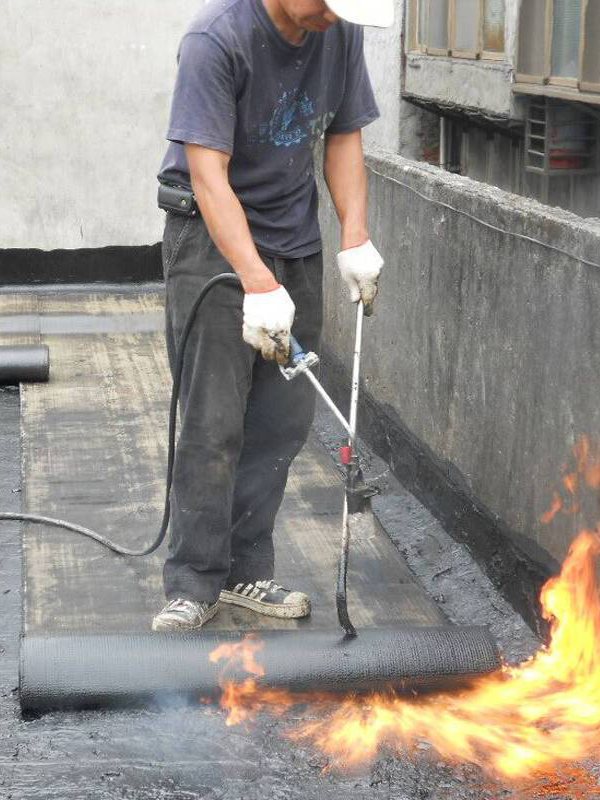
As soon as the membrane is heated, roll it forward immediately, then press with a roller from the centerline outward. This drives out any trapped air and ensures full contact with no bubbles.
4. Lap Treatment: Width and the Squeeze-out Bead
The lap between two sheets of SBS waterproofing membrane is the seam of the system — handle it poorly and it becomes a leak path.
4.1 Lap Width
There is a hard rule: both long-edge and short-edge laps must be at least 100 mm wide. On many sites the actual lap is only 50–60 mm.
The consequence is direct: the seam becomes a leak channel, and because the leak point is so hard to locate, the only fix is often to rip out a large area of the membrane.
4.2 Squeeze-out Bead — the Quality Indicator
After torching the lap, you should see a continuous bead of molten bitumen squeezed out along the seam, roughly 3–5 mm wide and even from end to end. That bead is the visual proof that the lap is fully sealed.
Laps of upper and lower layers must also be offset by at least one-third of the roll width — never aligned directly above one another.

5. Edge Sealing, Acceptance Test & Protection
At every termination, heat the end of the SBS waterproofing membrane with the torch, press it flat with a steel trowel, fix it with a metal batten, and finally fill the joint with sealant. Skip this and water creeps behind the membrane along the open edge — over time the whole system fails.
After installation, run a ponding test on flat roofs: standing water depth at least 20 mm, retained for at least 24 hours. Once the test passes, install the specified protection layer right away to keep later trades from damaging the membrane.

6. Weather Limits and Site Safety
Hot-melt uses an open flame, so safety rules are strict:
- No work in rain or snow, and no work in winds of Beaufort 5 or above;
- Substrate and ambient temperature should not drop below -10°C;
- No other hot work on site at the same time. Flammable materials must be stored separately, away from ignition sources, and adequate fire extinguishers must be on hand;
- Every installer must complete dedicated safety training before handling the torch.

SBS Waterproofing Membrane Hot-Melt — Quick Spec Sheet
| Step | Key Specification |
|---|---|
| Substrate moisture | Below 9% — 1 m² dry-lay test for 3–4 h, no water mark |
| Internal / external corners | Fillet or 45° chamfer |
| Primer drying time | 4–8 h at substrate temp > 5°C, until tack-free |
| Additional layer width | ≥ 250 mm |
| Torch distance | 0.3–0.5 m, sweep side-to-side |
| Bitumen temperature | 200–230°C (glossy, slight bubbles) |
| Lap width | Long and short edges ≥ 100 mm; upper/lower offset ≥ 1/3 roll width |
| Lap squeeze-out bead | 3–5 mm wide, continuous and straight |
| Ponding test | Depth ≥ 20 mm, duration ≥ 24 h |
| Weather limits | No rain/snow, no wind ≥ Beaufort 5, temp ≥ -10°C |
FAQ: SBS Waterproofing Membrane Hot-Melt Questions
Q1. What is the easiest way to confirm the substrate is dry enough for an SBS waterproofing membrane?
Lay 1 m² of membrane flat on the substrate, leave it for 3–4 hours, then peel it back. If neither side shows a water mark, the surface is dry enough. Extend the standing time after rain or in humid conditions.
Q2. How do I know the bitumen has reached the right 200–230°C window for an SBS waterproofing membrane?
Use visual cues rather than a thermometer: the bitumen on the underside of the SBS waterproofing membrane should turn dark, glossy, slightly mirror-like, and show a few fine bubbles — that is the optimal bonding state.
Q3. Is a 50–60 mm lap acceptable on an SBS waterproofing membrane?
No. Both long-edge and short-edge laps on an SBS waterproofing membrane must be at least 100 mm. Anything narrower turns the seam into a leak channel that is very hard to trace and repair.
Q4. The 24-hour ponding test failed. Do we have to redo the SBS waterproofing membrane?
Yes. If the standing water level drops noticeably, or local areas stay wet, locate the leak and re-seal until the SBS waterproofing membrane passes the ponding test before any protection layer is added.
References & Further Reading
Need Help Specifying an SBS Waterproofing Membrane?
Whether you are designing a new roof or re-roofing an existing one, our team can support you with material selection and a compliant hot-melt construction plan for your next project.